
Buena Park Wood Flooring has handled wood floor refinishing in Buena Park, CA for 20+ years, serving surrounding cities including La Palma, La Mirada, Cypress, Cerritos, Stanton. We take tired, scratched and grayed hardwood back to bare wood and build a new finish on it, or, when the wood itself is still sound, freshen the surface with a screen and recoat instead.
A refinish is only as good as the diagnosis in front of it. Before any sander comes off the truck, we check what the floor is, how much wood is left, what finish is already on it, and whether anything underneath needs fixing first, so the price you approve is the price of the work that will actually be done.
Most of the floors we refinish sit in homes from the 1950s and 1960s, when oak strip laid over a wood subfloor was the standard. Those floors often have decades of life left in them, even after years under carpet, and bringing one back usually costs far less than replacing it.
What a Full Sand and Refinish Involves
Checking the Floor Before Any Sanding
We start by identifying the species and measuring how much wood remains above the tongue, which decides how aggressively the floor can be sanded. A floor that has been refinished several times before may have only one careful sanding left, and we tell you that before starting rather than finding it out when a tongue shows through.
We also check for loose boards, squeaks, water staining, and past repairs done with mismatched wood. Anything that should be fixed gets fixed before sanding, because a board replaced after the floor is finished never blends as well as one woven in first.
Drum Sander, Edger and Orbital Passes
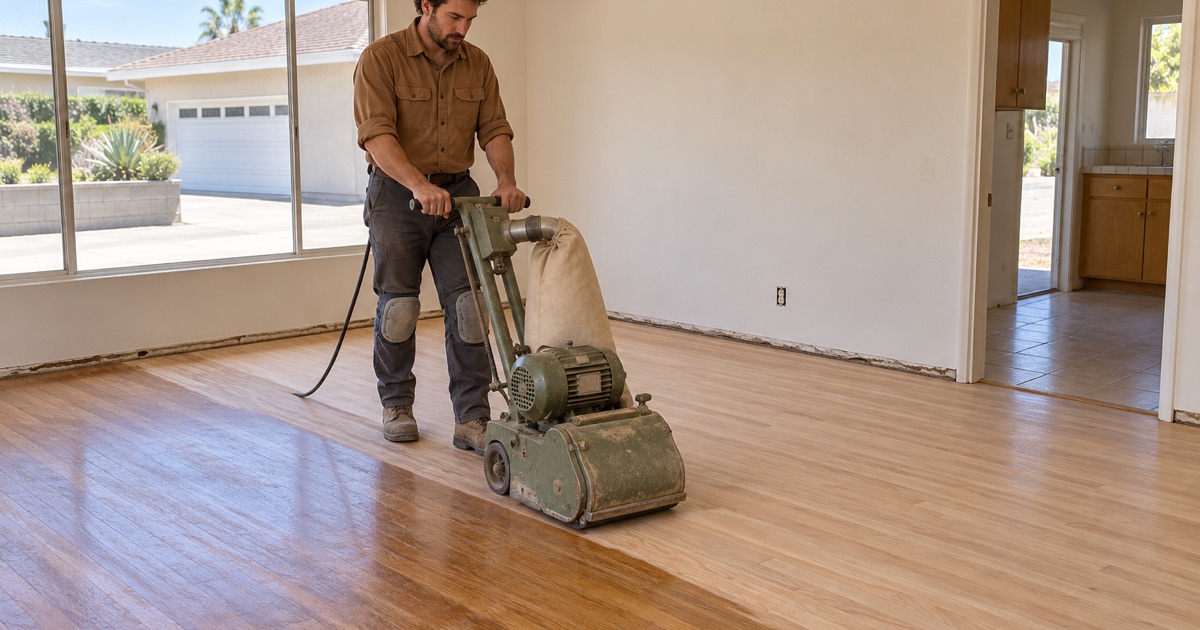
The main field of the floor is sanded with a drum sander, the perimeter and corners with an edger, and the whole floor is then smoothed with an orbital sander to remove the swirl marks the edger leaves. Each pass moves through a grit sequence, from coarse paper that cuts off the old finish to fine paper that leaves the surface ready for stain.
Skipping a grit is the most common shortcut in this trade, and it shows up later as scratch lines under the finish. We change paper often and check the floor under raking light before anything goes on it.
Stain, Sealer and Topcoats
If you want color, stain goes on after the final sanding pass and before any finish. We brush test patches on your own floor so you are choosing from real wood, and red oak, white oak and fir each take the same stain differently. A sealer coat follows, then the topcoats that do the actual work of protecting the wood.
Most floors get multiple coats of finish with drying time between each one and a light abrasion between coats for adhesion. The number of coats depends on the product and how the room is used, and it is written into the estimate.
Choosing a Finish in the South Coast Air Basin
Waterborne Polyurethane
Waterborne polyurethane dries clear, keeps white oak and light stains looking fresh, and has far less odor than solvent-based products, which matters when a family is staying home during the work. Modern two-component waterborne finishes are hard-wearing enough for kitchens and hallways, and they dry fast enough to put down more than one coat in a day.
Oil-Modified Polyurethane and the 275 g/L Limit
Oil-modified polyurethane gives red oak the warm amber tone many people expect from a traditional hardwood floor, and it deepens in color over the years. It also carries more solvent, and SCAQMD Rule 1113 caps wood coatings at 275 g/L of volatile organic compounds, so some oil-based finishes sold in other states cannot legally be applied here.
We choose only from products that meet that limit, which still includes compliant oil-modified options. If you have a particular product in mind, we check its label before it goes on your floor.
Hardwax Oil Finishes and Sheen Level
A hardwax oil finish soaks into the wood rather than forming a film on top, giving a low, natural look that can be spot-repaired without sanding the whole room. It needs more regular maintenance than polyurethane, so it suits owners who like caring for the floor. Whatever the finish, sheen level is a separate choice, and matte or satin hides everyday wear best.
Floors That Need More Than Sanding
Oak Strip Uncovered From Under Carpet
When carpet comes up, the oak strip underneath usually has carpet tack strip holes around the edges, staples across the field, and sometimes pad glue stuck to the old finish. We pull every staple, fill the holes, and remove the glue by hand before sanding, since adhesive gums up sandpaper and gouges the wood.
We also look for spots where the oak was patched or cut for a floor furnace or old heating register. Those openings can be filled with matching strips woven into the surrounding boards before the room is sanded as one surface.
Old Parquet and What Is Under It
Parquet from the middle of the last century can often be reglued, patched and sanded to a lighter tone than the dark finish it wore originally. The concern is the adhesive, since older parquet adhesive and black mastic can contain asbestos, and sanding through a loose block into that glue would spread it.
So we treat a parquet floor as an asbestos question first. Loose blocks are handled without disturbing the adhesive, and if lifting or grinding is needed, an asbestos survey comes before the work, following the approach SCAQMD Rule 1403 sets for renovation.
Painted Floors and Lead-Safe Sanding
Some older houses have oak or Douglas fir floors that were painted decades ago, especially in bedrooms, back rooms and enclosed porches. In a house built before 1978, that paint is treated as possibly containing lead, and the EPA Renovation, Repair and Painting rule governs how it is disturbed.
We contain the work area, use dust-extracting equipment, and clean and check the space before it is opened back up, rather than sanding painted boards the same way as an ordinary floor.
Living With the Work
Dust Control Inside an Occupied Home
Our drum sander and edger connect to a dustless sanding system that captures most of the dust at the machine. We seal the doorways and return vents of the rooms being sanded and plan the order of rooms so you keep a path to the kitchen, bathroom and front door for as long as possible.
A Written Cure Timeline, Room by Room
Finish that is dry to the touch is not cured, and most finish damage happens in the first days after the last coat, when a dragged chair or a rug laid too early marks it for good. We leave a written timeline listing when each room can take socks, shoes, light furniture, heavy furniture and finally rugs.
Screen and Recoat for Floors in Good Shape
When a finish is dull and lightly scratched but has not worn through to bare wood, a screen and recoat is the faster, less costly option. We abrade the existing finish with a buffer, clean the floor thoroughly, and apply a fresh topcoat that bonds to it.
The catch is contamination. Floors cleaned for years with polish or oil soaps may reject a new coat, so we test adhesion in a small area before committing the whole room.
- 20+ Years in Wood Flooring
- Itemized Written Estimates
- Lead-Safe Sanding